
This quick guide will walk you through how to install the Divi theme and set up your WordPress website.
Depending on which hosting platform you’ve chosen for your new website, the process to install WordPress may vary slightly, however once installed on your domain you will be able to follow the guide below.
Click here to read the instructions instead of watching the video.
Adding the Divi Theme
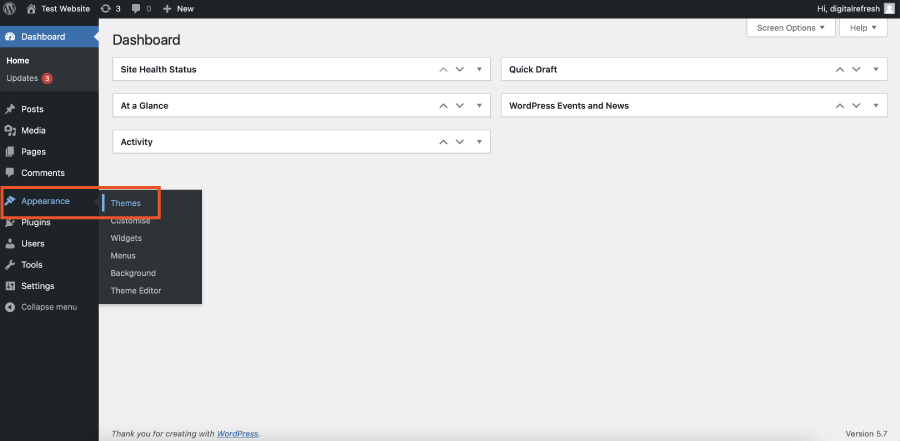
Down the left hand side of the WordPress dashboard, find and hover over the Appearance option and a new dropdown menu will appear. Select Themes.
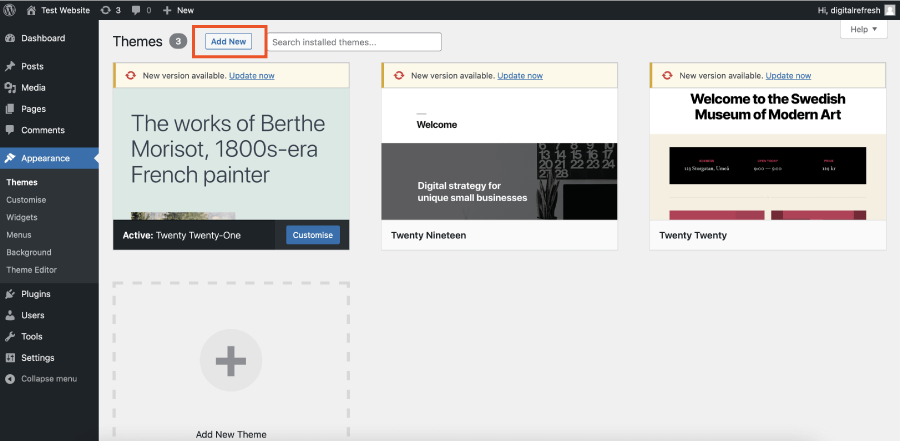
Click on Add New at the top of the page and on the next screen click Upload Theme.
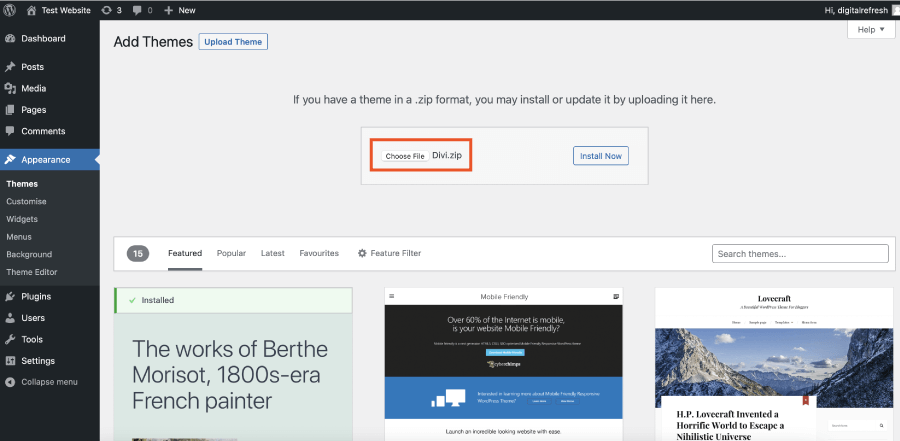
An option to Choose File will appear and allow you find the Divi.zip file from your computer. Select the correct file from your computer and click Install Now. Remember, there is no need to unzip the Divi.zip file, the full Divi theme files are present inside the compressed folder.
The file installation will run automatically. Once complete, you’ll see a success message. At this point, click Activate.
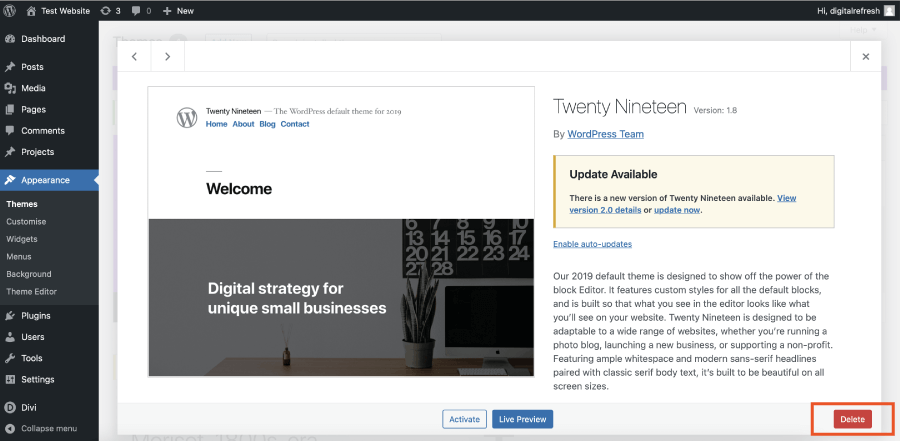
This step is not necessary but it’s good practice to remove all the free themes that appear such as Twenty Twenty One. Deleting the free themes helps to keep your website clean and secure as it’s unlikely you will be updating these themes.
Hover over the theme and button labelled Theme Details will appear. Click this button to be taken to a theme detail page and at the bottom right corner you will see in red, the word Delete. Click this button and confirm your deletion.
Now that the Divi theme is installed and activated, the front end of your site will show the default Divi theme. With he Divi theme up and running, you can now set up your page and menu structure.
The below steps can be completed in any order but we highlighted the process we take.
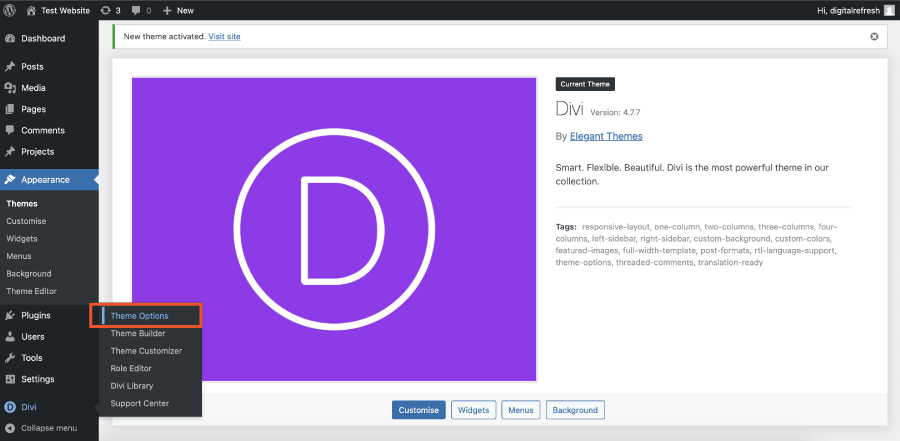
We first need to ensure the Divi theme builder in activated for when we begin to create pages. Down the left hand side of the WordPress dashboard find the Divi option, hover over it and select Theme Options.
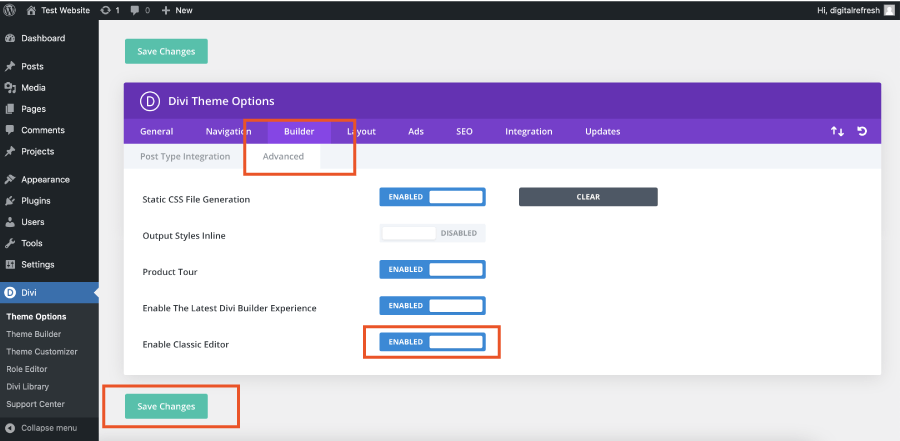
Across the purple bar with under where it says Theme Options, select Builder >> Advanced and make sure Enable Classic Editor is turned on. Click on the green button labelled Save Changes.
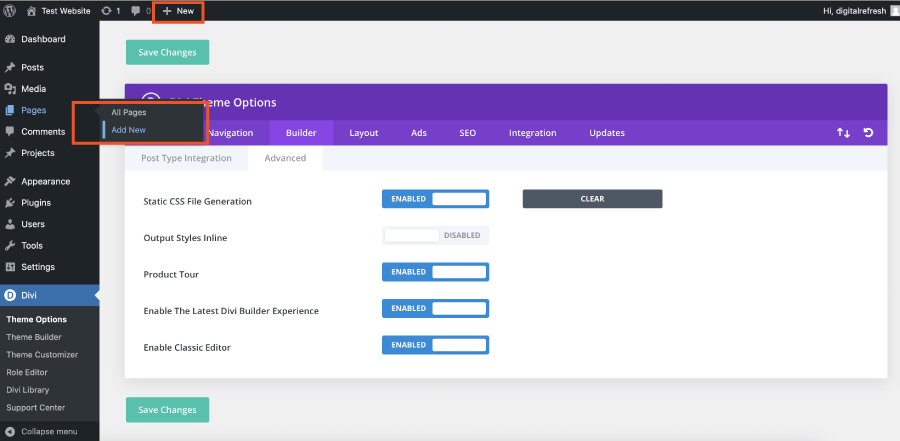
Before we create the menu / navigation we need to create some pages. Down the left hand side of the WordPress dashboard, find and hover over the Pages option and select Add New. Alternatively across the admin bar at the top of the page you can hover over where it says + New and then click on Page.
Choose your page name, the first one to add in is usually Home. Enter this where it says Add Title. Once you’ve added in your page name, click on the purple button that says Use Divi Builder. This will then bring up three options, Build From Scratch, Choose A Premade Layout or Clone Existing Page.
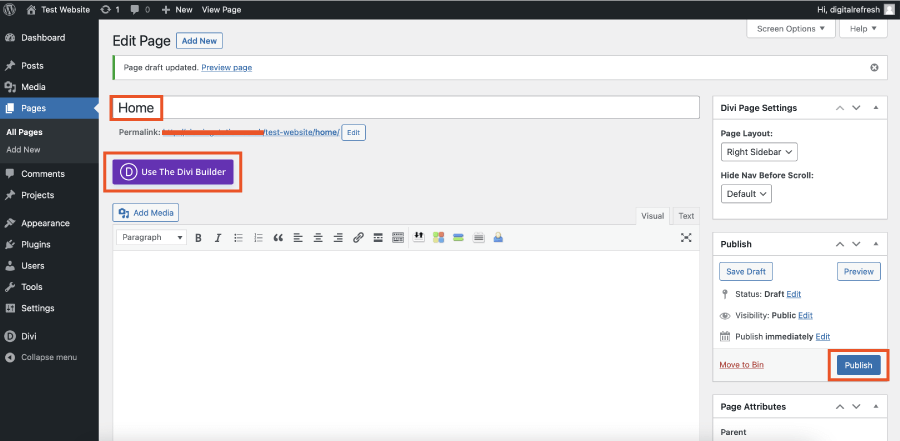
For now, if we click on Build From Scratch, the Divi Builder will ask you to start adding a row for your first section. Click off this using the X at the top right of the purple box labelled Insert Row. Now find and click the blue button on the right hand side of the page labelled Publish.
Repeat the above instructions for each new page that you wish to add.
Now your page is published you may notice that the URL or the permalink for the page (found under the Page Title) doesn’t look very pretty, both to look at or if it was to appear on the search engines. This is because we’ve not set the permalink structure just yet.
Down the left hand side of the WordPress dashboard, find and hover over the Settings option and select Permalinks. Make sure Post Name is selected. Scroll to the button of the page and select the blue button Save Changes. This will change all your permalinks so that they are the same as the Page Title.
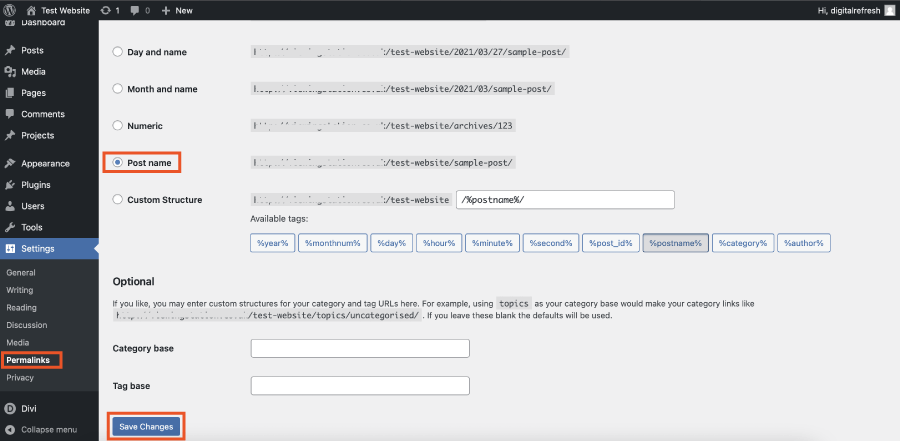
An example of a pretty permalink (or one using the Post Name option) would be a page called About Us – this would become www.mydomain.co.uk/about-us. Services would become www.mydomain.co.uk/services.
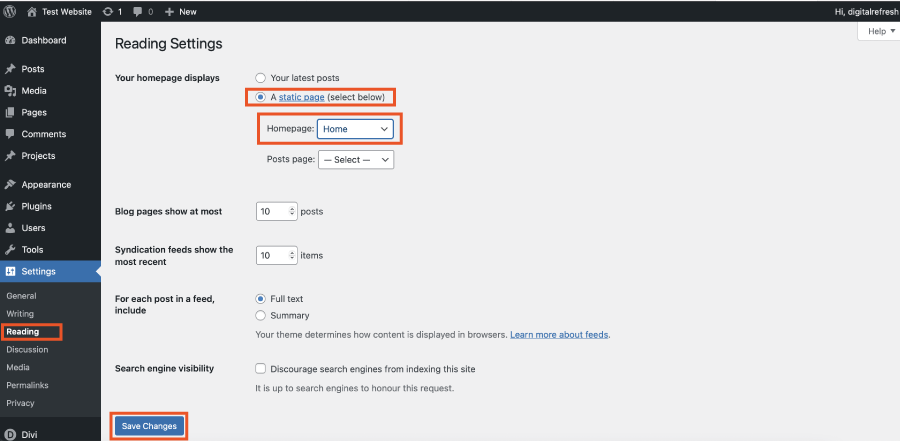
While we are under the Settings option, we can now choose which page we would like to display as the main or front page of your website. Hover over the Settings option and select Reading.
The first option on this page is labelled Your homepage displays, we need to make sure A Static Page is selected and then next to Homepage, and from the dropdown, select the page you wish to be your main or home page. Almost always this will be the page you have created called Home or Homepage.
We’re nearly done now, the final stage is to set up a navigation or menu which will appear in the Primary Header.
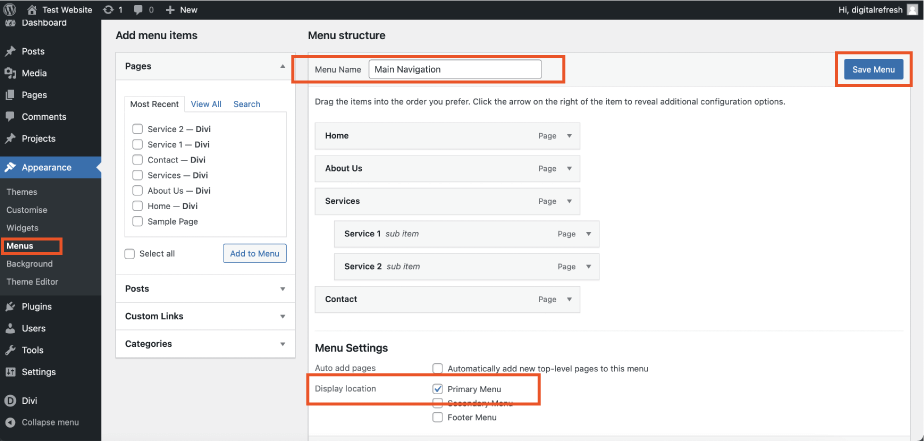
Down the left hand side of the WordPress dashboard, find and hover over the Appearance option and select Menus. Click on create a new menu and in the Menu Name box enter your chosen menu name and click the blue button, Create Menu. To keep things simple we recommend calling your first menu Main Navigation. If you create a second menu you may want to call it Secondary Menu.
It does not matter what you call the menu’s, this is just to make it easier to identify each menu.
Your menu page should reload after clicking on the Create Menu button. Down the left hand side will be options to add different kinds of pages, posts or even create your own custom link. For now if you click on the pages tab you will see a list of all the pages you have created. Select the ones you want and click the Add to Menu button.
Your pages will now appear on the right as part of your menu. Be sure to rearrange the order of the pages to your preference. If you want to have a menu item as a drop down, drag it to the right slightly and it will sit under another menu item. Be sure to select Primary Menu in the checkbox below and click Save Menu. If you are creating a secondary menu be sure to select Secondary Menu. The same applies if you are creating a menu to be used in the footer of your website, select the Footer Menu option.
If you click on the house icon at the top left of the admin bar which is next to the URL or the title of your website it will take you back to view your website from the home page.

Voila, you have now set up the framework for your website using Divi and WordPress.
It may look very basic and in need of a makeover, but it’s now ready for you to build your own website from scratch or add in a pre-made layout.
0 Comments